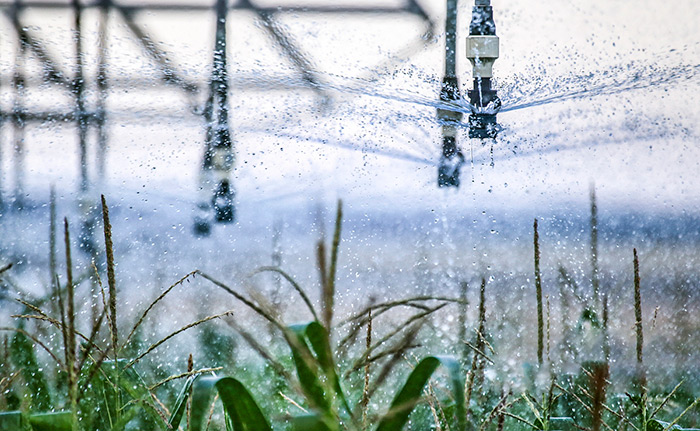

A Setulo sa ho tlama sa PPe sebetsa ka potlako ha motho a hloka ho emisa ho dutla ha metsi tsamaisong ea hae ea nosetso. Balemi ba lirapa le balemi ba tšepa sesebelisoa sena hobane se etsa tiiso e tiileng, e sa keneleng metsi. Ka ho kenngoa hantle, ba ka lokisa ho dutla kapele le ho boloka metsi a phalla moo a hlokahalang haholo.
Lintlha tsa Bohlokoa
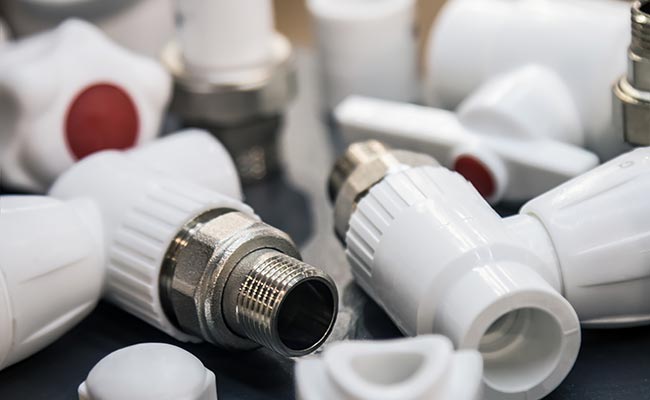
- Sale ea PP clamp e thibela ho lutla kapele ka ho koala libaka tse senyehileng liphaepheng tsa nosetso ka thata, e leng se bolokang metsi le chelete.
- Ho khetha boholo bo nepahetseng le ho hloekisa bokaholimo ba phaephe pele ho kenngoa ho netefatsa tiiso e matla, e se nang ho dutla.
- Tiisa diboutu tsa clamp ka ho lekana mme o leke ho dutla ho fumana tokiso e tshepahalang le e nkang nako e telele.
Saddle ea PP Clamp: Ke Eng le Hobaneng e Sebetsa

Kamoo Saddle ea PP Clamp e Thibelang ho Dutla ha Metsi
Saddle ea PP clamp e sebetsa joaloka bandeji e matla bakeng sa liphaephe. Ha motho e mong a e beha holim'a sebaka se senyehileng, e phuthela ka thata ho potoloha phaephe. Saddle e sebelisa moralo o ikhethang o hatellang phaephe le ho koala sebaka seo. Metsi a ke ke a tsoa hobane clamp e etsa hore e tšoarehe ka thata. Batho ba atisa ho e sebelisa ha ba bona lekhalo kapa lesoba le lenyenyane moleng oa bona oa nosetso. Saddle ea clamp e lekana hantle 'me e thibela ho lutla hang-hang.
Keletso: Kamehla etsa bonnete ba hore bokaholimo ba phaephe bo hloekile pele o kenya sale ea sekhomaretsi. Sena se thusa sekhomaretsi ho lula se tiile ebile se sa lutle.
Melemo ea ho Sebelisa Saddle ea PP Clamp ho Nosetsong
Balemi ba bangata le balemi ba lirapa ba khetha sale ea PP clamp bakeng sa bonalitsamaiso tsa nosetsoMabaka a mang ke ana:
- Ho bonolo ho e kenya, kahoo litokiso li nka nako e nyane.
- Setulo sa ho khomarela se lekana boholo bo fapaneng ba liphaephe, e leng se etsang hore se tenyetsehe haholo.
- E sebetsa hantle tlas'a khatello e phahameng, kahoo e ka sebetsana le mesebetsi e boima.
- Thepa ena e hanela mocheso le tshusumetso, ho bolelang hore e nka nako e telele.
- E thusa ho boloka metsi moo a lokelang ho ba teng, e boloka chelete le mehloli.
Sale ea PP clamp e fana ka khotso ea kelello. Batho ba tseba hore sistimi ea bona ea nosetso e tla lula e le matla ebile e sa lutle.
Tataiso ea ho Kenya Saddle ea PP Clamp ea Mohato ka Mohato

Ho Khetha Saddle e Nepahetseng ea PP Clamp Saddle
Ho kgetha boholo bo nepahetseng ho etsa phapang e kgolo bakeng sa tokiso e se nang ho dutla. Mohlomi o lokela ho qala ka ho lekanya bophara ba kantle ba phaephe e kgolo. Sekala sa caliper kapa theipi se sebetsa hantle bakeng sa sena. Ka mora moo, ba hloka ho hlahloba boholo ba phaephe ya lekala e le hore sehokelo sa sale se tshwane hantle. Ho tsamaellana ha thepa le hona ho bohlokwa. Mohlala, phaephe e bonolo jwalo ka PVC kapa PE e hloka sehokelo se sephara ho qoba ho petetsana haholo, ha phaephe ya tshepe e ka sebetsana le sehokelo se sesesaane.
Mona ke lethathamo le bonolo la ho khetha boholo bo nepahetseng:
- Lekanya bophara ba kantle ba phaephe e kgolo.
- Hlalosa bophara ba phaephe ea lekala.
- Netefatsa hore sale le thepa ea phaephe li sebetsa hantle hammoho.
- Khetha mofuta o nepahetseng oa khokahano, joalo ka e nang le khoele kapa e flanged.
- Etsa bonnete ba hore setlamo se lekana le botenya ba lebota la phaephe.
- Netefatsa hore tekanyo ea khatello ea clamp e tsamaellana kapa e feta litlhoko tsa phaephe.
Keletso: Bakeng sa libaka tse nang le mefuta e mengata ea liphaephe, li-clamp tsa saddle tse pharaletseng li thusa ho koahela bophara bo fapaneng.
Ho Lokisetsa Phaephe bakeng sa ho E kenya
Bokaholimo bo hloekileng ba phaephe bo thusa ho tiisa saddle ea PP clamp saddle ka thata. Mohlomi o lokela ho hlakola litšila, seretse, kapa mafura sebakeng seo clamp e tla ea ho sona. Haeba ho khoneha, ho sebelisa primer ho ka thusa ho tšoara saddle hamolemo. Bokaholimo bo boreleli, bo omileng bo fana ka liphetho tse ntle ka ho fetisisa.
- Tlosa lithōle kapa mafome afe kapa afe a hlephileng.
- Omisa phaephe ka lesela le hlwekileng.
- Tšoaea sebaka seo setlamo se tla lula ho sona.
Ho kenya Saddle ea PP Clamp
Jwale ke nako ya ho behaSetulo sa ho tlama sa PPhodima phaephe. Mohlomi o beha sale hodima moo ho dutlang kapa moo lekala le hlokahalang teng. Sale e lokela ho dula e bataletse kgahlanong le phaephe. Disale tse ngata tsa PP clamp di tla le diboutu kapa dikurufu. Mohlomi o di kenya mme o di tiisa ka letsoho qalong.
- Beha sale e le hore sehokelo se shebane le tsela e nepahetseng.
- Kenya diboutu kapa dikurufu ka hara masoba a dikonopo.
- Tiisa bolte e 'ngoe le e 'ngoe hanyane ka hanyane, u tsamaee ka mokhoa o ts'oanang.
Ela Hloko: Ho tiisa diboutu ka ho lekana ho thusa sale ho tshwara phaephe ntle le ho baka tshenyo.
Ho tiisa le ho tiisa setlamo
Hang ha sale e lutse sebakeng sa eona, mohlomi o sebelisa sepane ho qeta ho tiisa liboutu. Ha lia lokela ho tiea haholo, kaha sena se ka senya phaephe kapa sehokelo. Sepheo ke ho lekana hantle ho tšoara sale ka tieo.
- Sebelisa sepanere ho tiisa bolte e 'ngoe le e 'ngoe butle-butle.
- Netefatsa hore sale ha e sisinyehe kapa ha e sekame.
- Etsa bonnete ba hore setlamo se ikutloa se sireletsehile empa se sa tiea haholo.
Bahlahisi ba bang ba fana ka boleng ba torque bakeng sa ho tiisa. Haeba ho le teng, mohlomi o lokela ho latela linomoro tsena bakeng sa tiiso e ntle ka ho fetisisa.
Ho Lekola ho Dutla le ho Tharolla Mathata
Kamora ho kenya, ke nako ea ho leka tokiso. Mohlomi o bulela metsi mme o shebella sebaka sa clamp haufi-ufi. Haeba metsi a dutla, ba tima metsi mme ba hlahloba diboutu. Ka linako tse ling, ho tiisa hanyane kapa ho lokisa kapele ho lokisa bothata.
- Bulela metsi butle-butle.
- Hlahloba setlamo le phaephe bakeng sa marothodi kapa di-spray.
- Haeba ho hlaha ho dutla ha metsi, tima metsi mme o tiise diboutu hape.
- Pheta teko ho fihlela sebaka seo se dula se omme.
Keletso: Haeba ho dutla ho ntse ho tswela pele, netefatsa habeli hore boholo ba sale le thepa ya phaephe di a tshwana. Ho lekana hantle le bokahodimo bo hlwekileng hangata di rarolla mathata a mangata.
Ho kenya sale e nepahetseng ea PP clamp ho boloka litsamaiso tsa nosetso li sa lutle ka lilemo tse ngata. Ha motho a latela mohato o mong le o mong, o fumana liphetho tse matla le tse tšepahalang. Batho ba bangata ba fumana sesebelisoa sena se le molemo bakeng sa litokiso.
Hopola, tlhokomelo e nyane nakong ea ho seta e boloka nako le metsi hamorao.
LBH
Ho nka nako e kae ho kenya sale ea PP clamp?
Batho ba bangata ba qeta mosebetsi ka metsotso e ka tlase ho 10. Ts'ebetso e tsamaea kapele ka lisebelisoa tse hloekileng le phaephe e lokisitsoeng.
Na ho na le motho ea ka sebelisang sale ea PP clamp holim'a thepa efe kapa efe ea phaephe?
Li sebetsa hantle haholo liphaepheng tsa polasetiki tsa PE, PVC, le tse ling tse tšoanang. Bakeng sa liphaephe tsa tšepe, hlahloba lintlha tsa sehlahisoa kapa u botse mofani oa thepa.
Motho o lokela ho etsa eng haeba sale ea clamp e ntse e lutla kamora ho e kenya?
Taba ea pele, hlahloba liboutu hore na li tiile hakae. Hloekisa phaephe hape haeba ho hlokahala. Haeba ho lutla ho tsoela pele, etsa bonnete ba hore boholo ba sale bo tsamaisana le phaephe.

Nako ea poso: Phuptjane-27-2025